Browsing Category

EAT

Easy BBQ Coq au Vin

EAT, family meals By July 17, 2014 Tags: , , , , , , , , , , No Comments

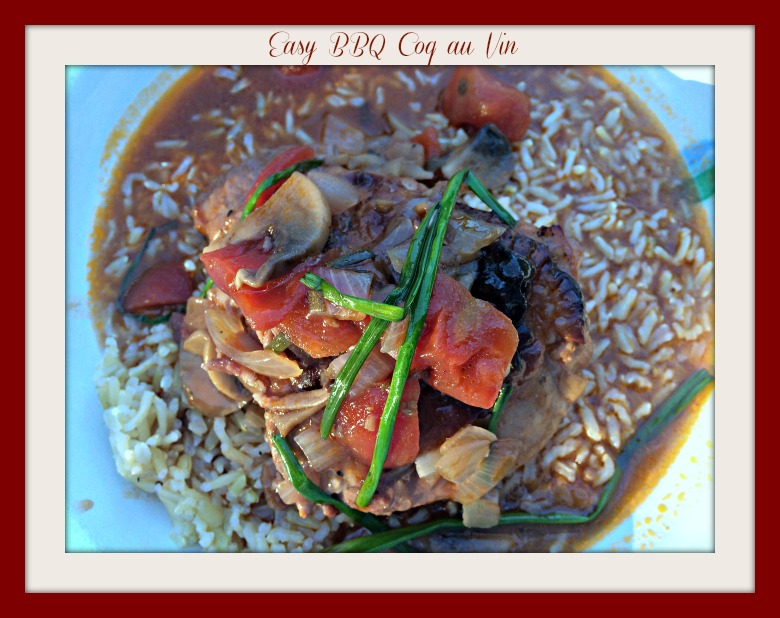
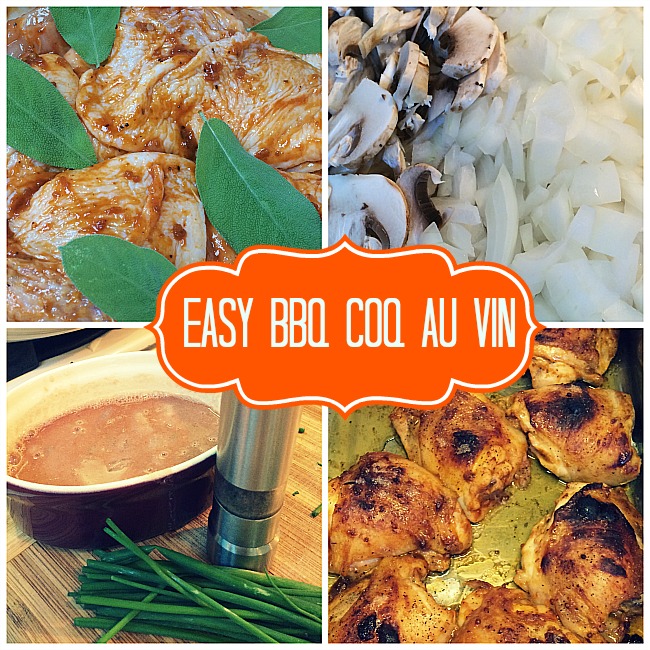
Coq au vin bbqA favourite dish of mine from the time I was a small child, Coq au Vin has always been a labour of love. Asked to test the Clubhouse LaGrille Smokehouse Maple Marinade in a coq au vin recipe, I was elated!! Armed with bacon, chives, chicken and homemade stock, I was ready! And then I fell. And broke my wrist. Now the challenge was twofold – could I make a coq au vin that is not as labour-intensive as my age-old recipe? And could I manage it with only my dominant hand…

The answer to the second question became fairly apparent as my husband helped chop and lift my stunning Le Creuset pot to the stove. This recipe development experiment would be a family affair, and with my husband involved, it had to involve the grill! The recipe was adapted from the Clubhouse website, which allows you to print ideas in popular recipe book sizes using backgrounds you choose yourself. I was astonished at how simple and full of flavour the dish was, and I only added a few of my own ideas! It also had the added benefit of very easy clean-up facilitated by grilling the chicken on the BBQ.

All You Need for Easy BBQ Coq au Vin:

1 ½ lbs (750 g) chicken thighs
5 tbsp (75 mL) Club House La Grille Smokehouse Maple Rub Marinade, divided
2 slices bacon, chopped
1 cup (250 mL) each pearl onions and quartered mushrooms
1 cup (250 mL) no salt added diced tomatoes with juice
2 cups (500 mL) homemade Chicken Stock
1 cup (250 mL) red wine
2 tbsp (30 mL) Club House Rice Flour
2 tbsp chives
2 tbsp sage leaves
1 tbsp tomato paste

Easy BBQ Coq au Vin

All You Do for Easy BBQ Coq au Vin:

1. In a medium bowl, combine chicken thighs with 3 tbsp (45 mL) rub marinade and marinate for 30 minutes.
2. On a medium heat grill, cook chicken thighs on both sides for 7 minutes making sure to obtain good grill marks and making sure not to burn chicken.
3. In a medium saucepan on high heat, sauté bacon, pearl onions and mushrooms for 2 minutes. Add remaining rub marinade, tomatoes, chicken stock and grilled chicken thighs.
4. Combine red wine and rice flour along with some of the liquid from the pot to make a roux. This will help you avoid lumps in your sauce. Add it to the above mixture and stir well. Bring to a boil, cover, remove from heat and place into a preheated 375°F (190°C) oven. Cook for 30 minutes, or until internal temperature of chicken reaches 165°F (74°C). *You could also assemble all of the ingredients in a slow cooker after grilling the chicken.
5. Serve over your favorite pasta or rice.

In all, we had a wildly successful dinner with very easy cleanup. The only problem was that there were no leftovers….

What are some of your favourite things to make on the grill? Share your stories with me on Twitter using the hashtag #FlavourStory!

Easy Coq au Vin

Disclosure: This is a sponsored post made possible by Clubhouse La Grille. All images and opinions are our own.

Share:

Gazpacho

EAT, family meals By July 3, 2014 Tags: , , , , , , No Comments

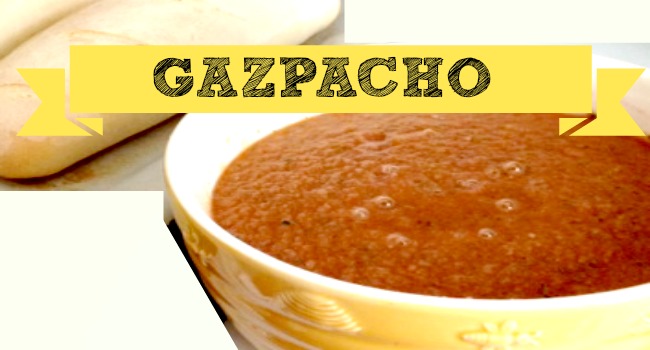
Gazpacho RecipeGazpacho is an incredibly healthy and refreshing summer soup. If you happen to own a Vitamix it is even simpler! (And will save you some time to make mouth-watering fresh bread).

4 cups tomato juice
1 onion
1 green bell pepper
1 cucumber, seeds removed
2 cups chopped tomatoes (better if skins are removed, canned tomatoes can substitute)
2 green onions
3 tablespoons fresh lemon juice
2 tablespoons red wine vinegar
1 teaspoon dried basil
1 teaspoon dried tarragon
1/4 cup chopped fresh parsley
1 teaspoon sugar
salt and pepper to taste

Coarsely chop vegetables. Place all ingredients in a blender or food processor. Blend until well combined, but still a bit chunky. Chill at least two hours before serving.


Share:

The Great Canadian Grille-Off

EAT, entertain By June 27, 2014 Tags: , , , , , , , , , , , , No Comments

Great Canadian Grille-OffIt’s almost here!! Canada Day long weekend is as synonymous with outdoor grilling as Victoria Day is with the number 24. You have the grill, the apron and the tools that a certain someone received for Father’s Day, but now comes the hard part: recipes and spices. My son has taken to creating special dry rubs for ribs and marinades for beef, but at the age of eight he’s no match for the two celebrity chefs going head to head for a culinary Canada Day grilling dual! It’s The Great Canadian Grille-Off!
Throughout the summer, eight celebrity chefs from across Canada will compete in four culinary duels to determine the best barbecue recipes using Club House products. To celebrate this Canada Day long weekend, chefs Karen Barnaby and Trevor Bird will try their hand at recipes they have created using Club House products – namely La Grille Wild Whiskey Smoked BBQ Sauce and La Grille Vintage Smokehouse with Honey BBQ Sauce. So what will it be? Karen’s Easy BBQ Beans or Trevor’s Whole Roasted Duck?

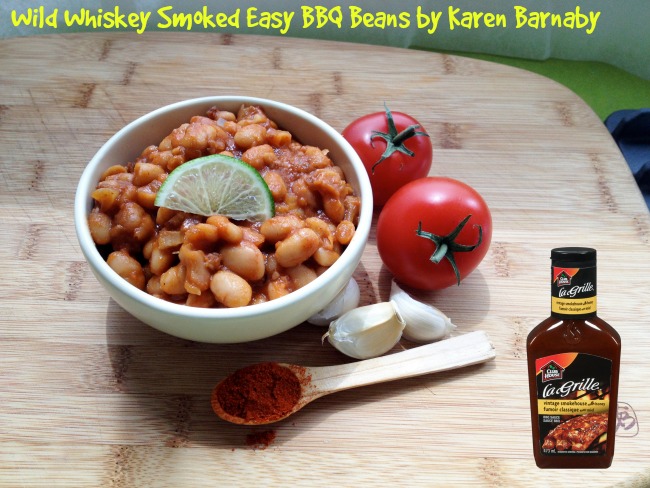
Wild Whiskey Smoked Easy BBQ Beans by Karen Barnaby

UM: Why did you choose this dish?
KB:
Baked beans are great with barbecued food. When the inspiration hits, I want beans that are quick and delicious. The recipe is fast and easy, and can be cooked outside on a BBQ burner. For the delicious part, La Grille Wild Whiskey BBQ Sauce provides that.

Karen Barnaby BBQ BeansPrep Time: 20 Minutes
Cook Time: 30 Minutes

Ingredients (Serves 4)

  • 2 15 oz (470 mL) cans white beans of your choice
  • 4 slices bacon, diced
  • 1 cup (250 mL) diced onion
  • 1 clove garlic, minced
  • 1/2 cup (125 mL) Club House La Grille Wild Whiskey Smoked BBQ Sauce
  • 2 Tbsp (30 mL) light or dark brown sugar
  • 1 Tbsp (15 mL) tomato paste
  • 1/2 cup (125 mL) water
  • 1 tsp (5 mL) Worcestershire sauce
  • 1/2 tsp (2.5 mL) Club House chili powder
  • 1/4 tsp (1 mL) Club House ground cumin
  • Club House Sea Salt Grinder
  • Club House Black Peppercorn Grinder

Directions:

  1. Drain the beans and rinse under cold water. Set aside.
  2. In a pot, over medium high heat, cook the bacon until browned.
  3. Add the onions and garlic and cook until soft.
  4. Add Club House La Grille Wild Whiskey Smoked BBQ Sauce, brown sugar, tomato paste, water, Worcestershire sauce, chili powder, cumin, salt and pepper.
  5. Bring to a boil then reduce to a simmer and add the beans.
  6. Simmer for 30 minutes, stirring occasionally. Add a little water if the mixture looks too dry.
  7. Check the seasoning and serve 

Chef Trevor Bird makes a delicious Whole Roasted Duck with Vintage Smokehouse with honey BBQ sauce! Try it for your next backyard BBQ party!


Whole Roasted Duck with Vintage Smokehouse Honey BBQ Sauce       


UM: What makes this dish such a popular choice  at Fable Kitchen, your restaurant in Vancouver?
TB: At Fable we do a lot of family style cooking, and our whole duck is always a hit. With the long slow roast and heavy basting of the duck, it makes for a nice sticky glaze that will impress.
Whole Roasted Duck with Vintage Smokehouse Honey BBQ SauceYield: 4 portions
Prep time: 10 – 15 minutes
Cook time: 6 hours in oven

Ingredients:        

  • 1 Yarrow meadows/Brome Lake whole duck
  • 1 cup (250ml) Club House La Grille Vintage Smokehouse with Honey BBQ Sauce
  • 1/2 cup (125ml) Rice or wine vinegar
  • Club House Sea Salt Grinder
  • Club House Black Peppercorn Grinder


Procedure:                                                                                                               

1. Preheat oven to 250F, or 225F in a convection oven
2. Take your whole duck and wash the outside well, pat dry and season with salt and pepper
3. Mix the BBQ sauce and vinegar with a brush
4. Place the duck in the oven, after 3 hours of cooking, start to brush the duck with the BBQ sauce every 30 minutes
5. Check the duck after 5 hours. The leg should pull away from the body very easily like a confit.
6. If not ready, leave in the oven 1 more hour.
7. Serve on a platter with your favourite grilled products, roasted potatoes and a side of the Vintage Smokehouse with Honey BBQ sauce                                  

The whole bird falls apart so just grab some forks and dig in!

Share:

Who’s Making YOUR Breakfast in Bed?

EAT, holidays By June 12, 2014 Tags: , , , , , , , , , No Comments

Breakfast in BedMany parents are wakened on special occasions by an ominous clattering in the kitchen: loving-hearted children preparing to surprise us with coffee or hot chocolate in bed.  There’s also that cinnamon toast or oatmeal positively doused with sugar.

What many parents don’t realize is that such meals usually come courtesy of a whole crew of children.  Chocolate, coffee and sugar are often harvested by kids in developing countries.  Some children are even trafficked – taken from their parents to be sold into slavery – onto plantations far from home.  Others are forced into labour to help put food on the table at home.

Most Canadian parents struggle to keep costs down, yet our lower prices here are made possible by low pay overseas.  Many children are forced to work for no pay, making our price tags even more appealing.  Take cocoa for instance.

“An estimated 1.8 million children work to provide the world with its cocoa, in Cote d’Ivoire and Ghana,” says World Vision Canada’s Cheryl Hotchkiss.  Hotchkiss explains that child workers are often trafficked – kidnapped and sold – into labour.  They work in brutally dangerous conditions, with sharp machetes and toxic chemicals.  Many are physically abused so they’ll work harder.  Few are given adequate food or rest.

It’s easier to snuggle down under our covers than admit we live in a world where child labour is still prevalent.  But it’s also pretty simple to do something to help change things.  Fair trade cocoa, coffee, tea and sugar are available in many grocery stories.  While they cost more, the payoff is much greater than a mouthful of sweetness.

“We made it into a field trip,” says Toronto mom Debbie Wolfe, of her first fair trade shopping trip with her two sons. “We stood in the grocery aisle, read the labels, and talked about how we’d be helping a real child and his family.”

“We’ve never enjoyed a cup of hot chocolate so much.”

To learn more ways to help end child slavery, visit www.nochildforsale.ca

Disclosure: This post was made possible through efforts of World Vision Canada.

Share:
harry-potter-birthday-party

The Harry Potter Birthday Party

EAT, entertain, grow, LIVE By May 29, 2014 Tags: , , , , , , , , , 3 Comments

Whish Harry Potter Table

My son is now eight. He stumbled over words while reading and as a parent it was so hard to keep him from getting discouraged – until I dusted off an old Harry Potter book. Overnight he went from not being ‘allowed’ to read chapter books at school to finishing his first novel – The Philosopher’s Stone by J.K. Rowling. That’s what interest will do for education! A celebration was in order!

Potion class? Wand instruction? Floating candles? Of course.

For his eighth birthday we invited parents, all of the kids in the class and siblings for a huge Harry Potter birthday party. 26 kids for a sit-down dinner. Gulp. I love to entertain, create and spend oodles of time on the food for parties, but the logistics are always a pain. Whish Party approached me for a colaboration and I explained my idea. Patricia, the owner got just as excited as I was and gave me tons of planning tips. She then shipped me all I would need as basics for the party so that I could focus on the bits that I enjoy the most.

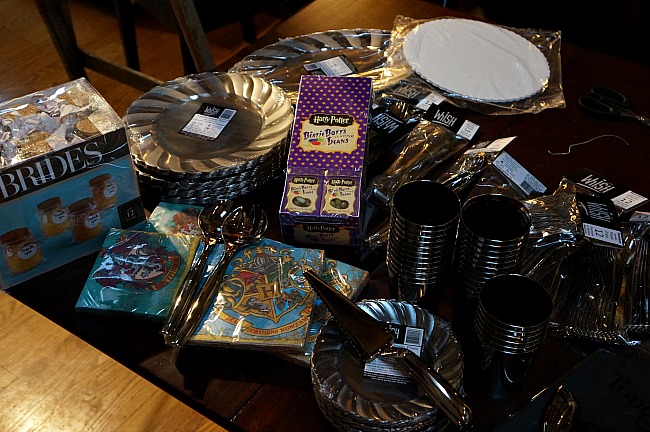
The box from Whish arrived and I squealed. It contained:

Whish Harry Potter Party

– Silver plastic plates, cutlery and glasses. I learned later that all are fine in the dishwasher and will certainly be used again!
– A cake base
– Silver plastic serving utensils
– Corked jars in which to store take-home favours (potion)
– Bertie Bott’s Every Flavour Beans
– Harry Potter napkins (One house on each quarter)
– A stuffed owl puppet with eyes that move
– Black plastic tablecloths

Harry Potter Birthday Party

Harry Potter Party Decor

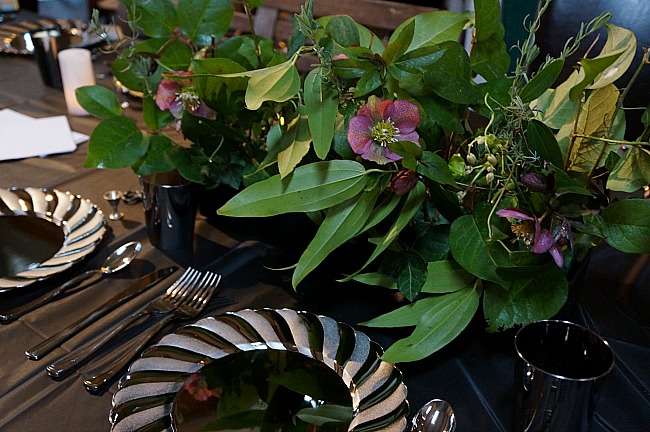
1. The Great Hall. Four long tables (including deck furniture and card tables) were stretched across the living room and covered with the black cloths.
2. Floating Candles. We tied twine to the ‘wicks’ of flameless candles (Whish told me not to use fishing wire as the light would reflect and you would see the wire). I made a loop at the ends of the twine and cut each at a different length. I then wrapped a piece of printer paper around the tea lights, taping it at the beginning and end. Voila! A candle. We used thumbtacks to affix the twine on each each ‘candle’ to our ceiling, alternating them between long and short.
3. Harry Potter References. Pinterest is amazing. I found numerous ideas and whipped up a few signs like ‘The Stairs Change’ at the bottom of the staircase and a photo of Moaning Myrtle underneath the toilet seat.

Harry Potter Party Food

Harry Potter Party Food

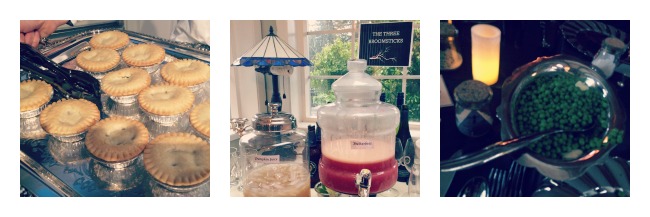
1. I went easy and British! Store-bought meat pies, mashed potatoes, gravy and peas. Healthy and there wasn’t a drop left! (And we’d assumed that because it wasn’t chicken fingers, pizza or mac and cheese they would complain…)
2. We did two drinks: Pumpkin Juice (aka whatever fruit punch was on sale) and Butterbeer.
Golden Snitch Cake3. Golden Snitch Cake. With white ostrich feathers from the craft store and golden sparkles.
Harry Potter Party Activities

A Harry Potter Birthday

1. As guests arrived we presented them with a Platform 9 3/4 train ticket. I snagged the idea from The World’s Worst Moms.
2. Using various jars and bottles and Over the Big Moon’s potion labels glued on, we did a Potion Class. For one potion I did the old standby: vinegar and water in one bottle and cornstarch and water in another. I put food colouring in each and the little wizards had to figure out what would happen when we poured the solution into the cauldron.

Whish also supplied me a recipe for slime that’s perfect for a goody bag.

Salazar Slytherin’s Serpent Slime:
1 Tbsp of Elmer’s Clear Glue
2 Tbsp of warm water
Few drops of your choice of food colouring
1/4 tsp. of Borax powder

a.  Combine Borax powder with 1 tbsp. of warm water
b.  In a separate bowl, mix glue and 1 tbsp. of warm water, then add your desired colour.
c.  Slowly add the Borax and water mixture to your glue mixture; thickening the slime.
d.  Knead until smooth.
e.  Store slime in an airtight container to keep it from escaping!

3. Wand Instruction. You may have a better method, but as the ‘Professor’ I stood on my king-sized bed and made the wizards stand in a line at the foot of the bed. They each had been given a ‘wand’ which was a dark brown chopstick bought in Chinatown. They were instructed to say ‘ridiculis’ and ‘expelliamous’. (Yes, I did several years at acting school but I bet you can find a theatrical friend to run this part of the party!) Each child’s spell made me flail, fall, quack, etc. This could also be done on a trampoline, bed of pillows….
4. Photo Booth. Because we invited adults and siblings there were many older girls who have a penchant for fashion design and photography. We assembled props, including the precious owl that I ordered from Whish, and the three year old in the group was charged with escorting one wizard at a time to the photo area. We did a digital as well as a polaroid snap of each model, and the polaroid was included in the thank you notes.

Harry Potter Party Goody Bags

Whish Party Harry Potter

I don’t believe in elaborate goody bags where most is dollar-store plastic to be thrown away or candy to ruin the rest of a parent’s night after kids have eaten cake and gotten excited with their friends. My true preferences are charity and philanthropy-related, so we donated money to Right to Play on behalf of my son. I did want to send the kids home with something, though. We cut burlap squares and filled them with the Bertie Bott’s Every Flavour Beans and a Soccer Ball (signifying Right to Play). They were each tied with twine and a tiny key. They also went home with their slime in each special jar.

So the parents could deal with a mess on their sofa instead of a sugar high. Ha!

A ton of work, kids that were in awe, and a total turn-key setup that allowed me to focus on what was really important: making memories and paying attention to detail.

Share:

Being Healthy Has its Rewards

EAT, lunches By May 14, 2014 Tags: , , , , , 7 Comments

Being Healthy Has its RewardsWe all want to be healthier, stronger and hit the ideal ratio of body fat to muscle. But since when have we actually been ‘rewarded’ for being healthy? Sure – you feel better within yourself and may get a few more whistles when walking past a construction site, but it is typically pretty challenging to become healthier. Personal trainers are expensive, deep-fried in restaurants seems to cost less, and finding a healthy meal on the go is a challenge. But being healthy has its rewards.

Lean CuisineAs many of our readers know, I have been training for a Run Disney event. Not having run more than a few feet and only when necessary (like being chased by a rabid dog), this was a huge challenge for me. Sure it was personally rewarding when I completed the run, but it took so much mental strength to force myself to train and be healthier. Perhaps I shouldn’t need a reward other than feeling good or personal satisfaction, but….
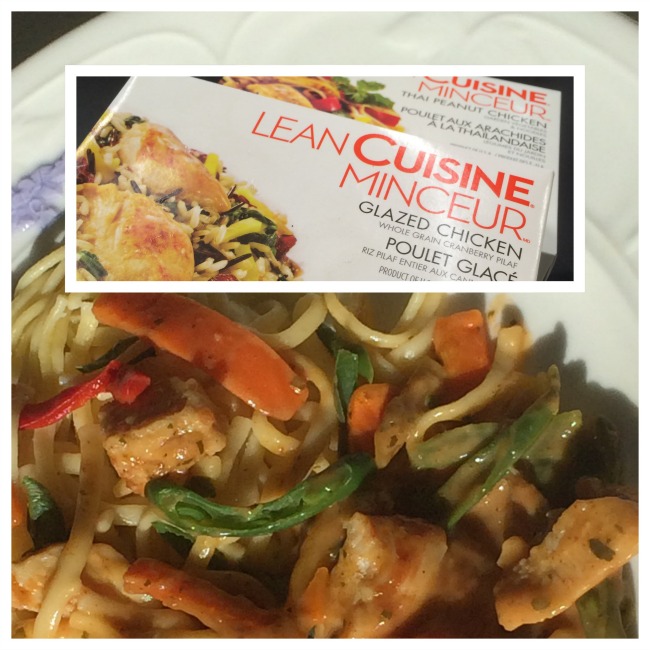
Part of becoming healthier has been my diet, and as a busy entrepreneur and Mom, washing lettuce leaves and chopping veggies is not always in the cards. I’ve always loved to stock my freezer with Lean Cuisine meals so I have something well balanced, filling and healthy when I need to eat in a hurry. Only now have I discovered that I can get rewarded for pulling this healthy trick out of my back pocket.

Lean Cuisine Thai ChickenThe Lean Cuisine Rewards program allows you to pop onto the internet and enter a PIN number found inside your favourite Lean Cuisine meal. The more you enjoy, the more you earn. Rewards range from coupons for free Lean Cuisine entrées to exercise balls, weights and home appliances.


Embarking on this new way to feel rewarded, I pulled a Thai Peanut Chicken out of the freezer. (This is where I admit that I didn’t eat breakfast and ate it at 9am after dropping the kids to school.)  After four and a half minutes in the microwave, the veggies were still crisp and the chicken was tender. There seemed to be a ton of chicken for a meal that only has 300 calories, 6g of fat and 40% of my daily vitamin A. I was delighted. And energized. I think I may actually go for a run! Ha!

Lean Cuisine Montage

Excited to check out my rewards, I went to the Lean Cuisine website and registered. There are healthy lifestyle tips, a rewards catalogue and you can also create a meal and exercise plan in order to reach specific goals. I, of course, got sidetracked by the rewards and made a wishlist: a Spafinder gift certificate, iTunes music credits, Best Health Magazine and a Hamilton Beach blender. Not that personal satisfaction isn’t enough (ahem) but that makes me want to get healthy.

How do you reward yourself? We can help out a bit – want to enter to win a free Lean Cuisine BONUS PIN code (good for one entrée or to start you off for larger rewards)? Just use this handy rafflecopter form. Canada only, ends 30. May, 2014. Good luck!

Disclosure: This post was generously sponsored by Stouffers Lean Cuisine Rewards, but the opinions and images are my own. For more information, visit Lean Cuisine Rewards.


Share:

Peachy Keen on Health

EAT, FAM, health, lunches By May 13, 2014 Tags: , , , , , , , , No Comments

Peachy Keen on HealthThis spring, the UrbanMommies team has been focusing on health. Jogging, extra water and vitamins have all been part of the routine. With the gardens not quite in bloom and stores of frozen fruit and veggies depleted, I started doing some digging on other options for getting nutrients through food. Canned cling peaches. Who knew? They are actually better canned than fresh and are readily available in stores – even in school lunch snack sizes.

Myth: Canned peaches are less nutritious than fresh peaches.
Fact: Canned peaches are actually more nutritious than their fresh and frozen counterparts. Canned peaches have 3.5 times the vitamin C, 10 times more folic acid and 1.5 times more antioxidants than their fresh counterparts. (And they are in stores all year round when there is nothing growing in your orchard!)

Myth: Canned peaches are full of sugar.
Fact: Canned California cling peaches have no added sugar in the juice or water that they are packed in, other than the natural sugar in the raw product.

Myth: Canned peaches lose their flavour and colour through the canning process.
Fact: Canned peaches retain their flavour, colour and firmness even when cooked or baked in entrees, appetizers or desserts.

Because California cling peaches are picked and packed usually within 24 hours, they retain their appearance, texture, flavour and nutritional content.

So… I need snacks after my runs. I need some great family meal ideas, and after 6 months of making school lunches, they were getting rather boring. Enter California Cling Peaches to remedy all of these situations! 

Check our recipes for gluten-free sweet chili and chicken peach wraps and peach, goat cheese and basil flatbread pizza.

Disclosure: This article was sponsored by California Cling Peaches. And we bet you learned a thing or two!

Share:

Peach, Goat Cheese and Basil Flatbread Pizza

EAT, family meals By April 16, 2014 Tags: , , , , , , No Comments

Peach Goat Cheese Basil FlatbreadDon’t know what to make for dinner tonight, this peach, goat cheese and basil flatbread pizza might become your go-to recipe.

2 naan, about 9-inches (23-cm) each or 1 thin pizza crust, about 11-inches (27.5-cm)
2 tsp (10 mL) olive oil
11/2 tsp (7 mL) za’atar spice*
½ cup (125 mL) creamy goat cheese
2 slices prosciutto, cut into strips
2 canned California Cling peach halves, cut into thin slices, well drained and patted dry
4 pitted black olives, cut in half
4 fresh basil leaves, shredded

1. Preheat oven according to package directions for naan or pizza. Brush tops with oil. Sprinkle each naan with ½ tsp (2 mL) za’atar or pizza with 1 tsp (5 mL) za’atar.

2. Place on baking sheet. Dollop evenly with goat cheese. Then scatter with prosciutto, peaches and olives. Bake according to package directions, until crust is hot and cheese is melted, about 2 to 4 minutes for naan and 6 to 8 minutes for pizza.

3. Remove from oven. Sprinkle with remaining ½ tsp (2 mL) za’atar and basil. Makes 2 servings for naan or 2 to 3 for pizza

*Za’atar is a blend of dried thyme, oregano, sumac and sesame seeds. Sometime ground cumin and salt is added.

Makes 6 servings

Share:
Sweet Chili Chicken Peach Wrap

Sweet Chili Chicken and Peach Wraps

EAT, family meals By April 16, 2014 Tags: , , , , , , 1 Comment

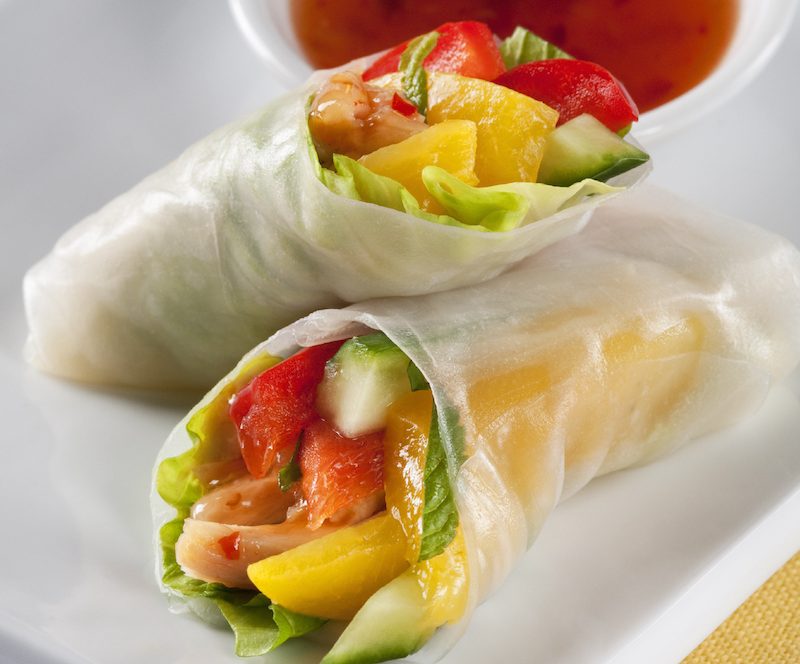
Instead of tortillas, try this gluten-free alternative. They’re easy to make, a super way to use leftovers and customize to your own taste.

11/4 cups (300 mL) cut into strips cooked chicken
3 tbsp (45 mL) Thai sweet chili sauce
1 (14 oz/398 mL) can California Cling peach halves or slices, in fruit juice concentrate or light syrup, drained and patted really dry
8 large rice paper round wraps
4 very small leaves Boston or leaf lettuce, torn in half
3-inch (7.5-cm) piece cucumber piece, cut into julienne strips
1/2 small red pepper, cut into julienne strips
8 to 12 mint leaves (optional)
Additional Thai sweet chili sauce for dipping

1. Have all your ingredients prepared. In a small bowl, stir chicken with sweet chili sauce. Fill a pie plate with warm water. Lay a damp smooth kitchen towel on the counter. Thinly cut peach halves into slices or use peach slices.

2. Working with 1 wrap at a time, dip in warm water until it is just pliable, 20 to 40 seconds. Place on kitchen towel. Place ½ a lettuce leaf near bottom of circle. Place 2 peach slices on top of lettuce, followed by 1/8 of chicken, then 1/8 of the cucumber and red pepper and 2 to 3 mint leaves depending on size.

3. Fold bottom (edge closest to you) of rice paper wrap over filling towards centre. Fold in sides to slightly cover filling. Then roll to totally enclose filling and form a roll. Set seam side down on a cutting board. Repeat with remaining ingredients. If sending for lunch, leave whole. If serving as an appetizer, slice in half diagonally. Serve with additional sweet chili sauce.  Best eaten right away but if storing, make sure they aren’t touching each other as they will stick. Cover with barely damp paper towel, then seal tightly with plastic wrap.

Makes 8 rolls

Share:

6 Minute Breakfast Frittata

EAT, family meals By April 2, 2014 Tags: , , , , , , , , , 3 Comments

6 Minute Breakfast Frittata

I love this recipe for a very quick breakfast frittata. It looks especially divine with fresh chives drizzled throughout!

Ingredients:

8 Eggs
10 tiny tomatoes chopped in half
3 slices cubed bread
1/2 cup chopped ham
1/2 cup grated cheese
1/4 c milk
1T olive oil
1/4 cup chopped fresh chives
salt and pepper to taste

Mix all ingredients in a bowl as you heat oil in a skillet on medium heat. Pour egg mixture into skillet and cook 4 minutes. Try not to touch it as it cooks. Using two spatulas, gently flip over your frittata and cook another 2 minutes.

Cut and serve.

Share: